Select an action
Upload file(s)
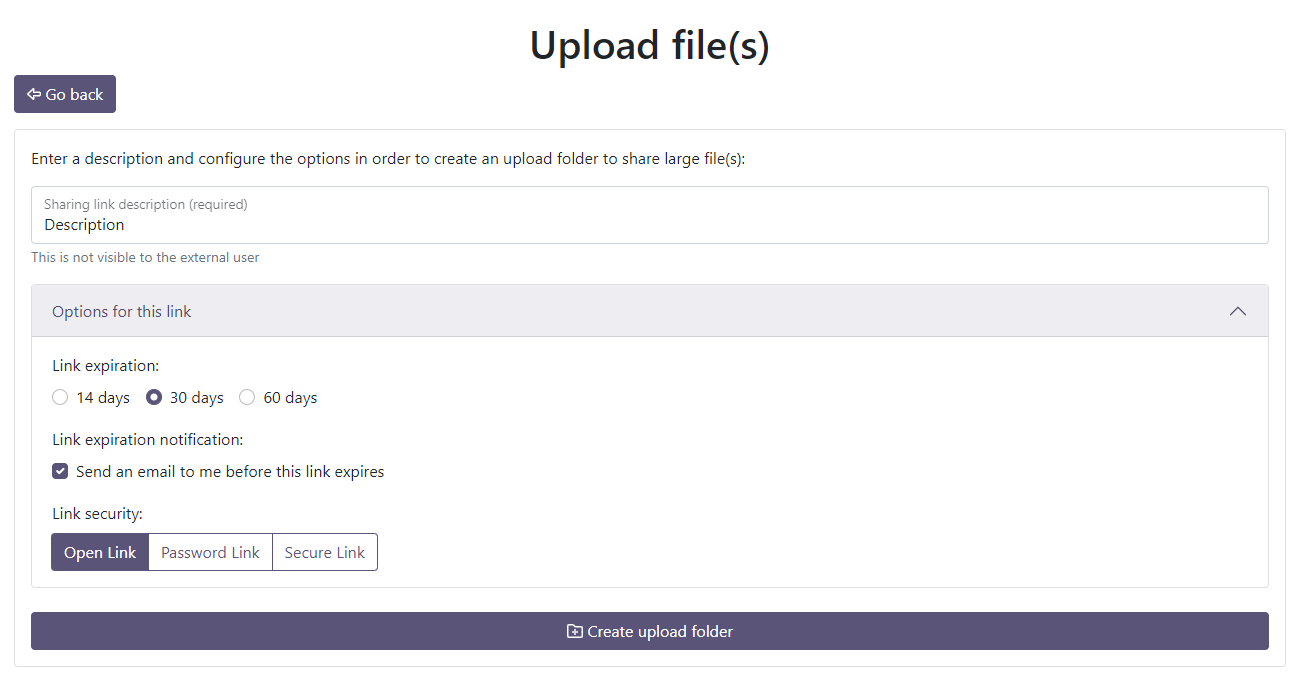
Enter a description and configure the options in order to create an upload folder to share large file(s):
Upload file(s)
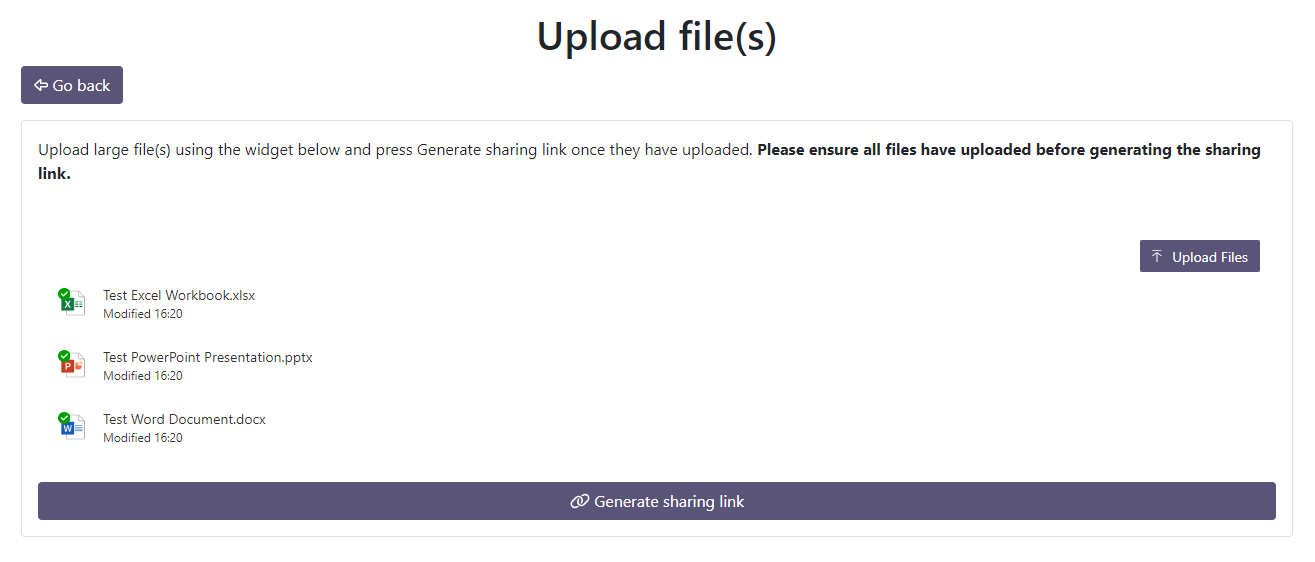
Upload large file(s) using the widget below and press Generate sharing link once they have uploaded. Please ensure all files have uploaded before generating the sharing link.
Configure sharing link
Generate a link so that external recipient(s) can upload large file(s).
Link created
Sharing link created
See below for your sharing link - this will expire after
Send link via email
View sharing link(s)
Loading
Loading
Loading
Help guide
Go to the External Sharing Portal and click on the Upload file(s) to send button:

Enter a description for the sharing link and optionally tweak the options for the link:
Link expiration determines how long the link will be active for (default is 30 days).
Link expiration notification allows you to toggle the notification email that is sent 2 days before a link expires (default is on).
Link security allows you to change the default security (Open Link) to a more secure standard (either Password Link for an automatically generated password, or a Secure Link which is restricted to your email and the external recipient(s) email address).
Once you have set the options, press Create upload folder.
On the next screen, you can upload files by either clicking the Upload Files button or by dragging files into the window. The files will show the upload progress below them and will have a green tick once they have finished uploading. Once they have all uploaded, press the Generate sharing link button. (You must ensure that all files have finished uploading before generating the sharing link - generating the sharing link before a file has uploaded will corrupt the file)
You will then be able to copy the link to your clipboard and paste it into an email ready to be sent to the external recipient. You can also send an email directly from the portal using the Send link button. If you set your link security to Password Link or Secure Link, the password/list of restricted users will also be shown on this page.

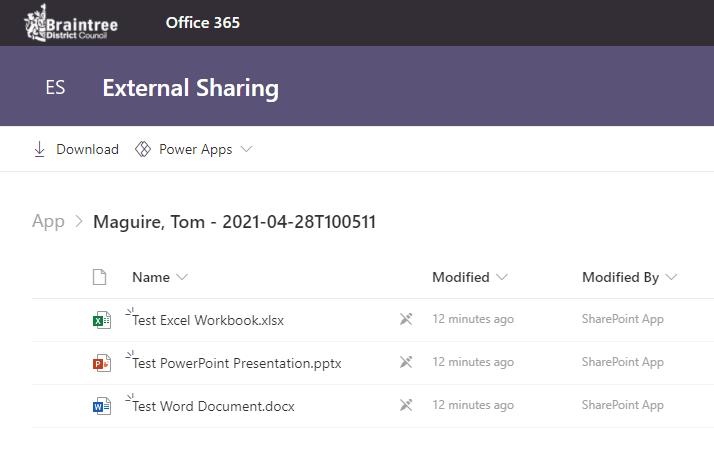
Files will display to the external recipient as below when using the link:
Go to the External Sharing Portal and click on the Request large file(s) button:

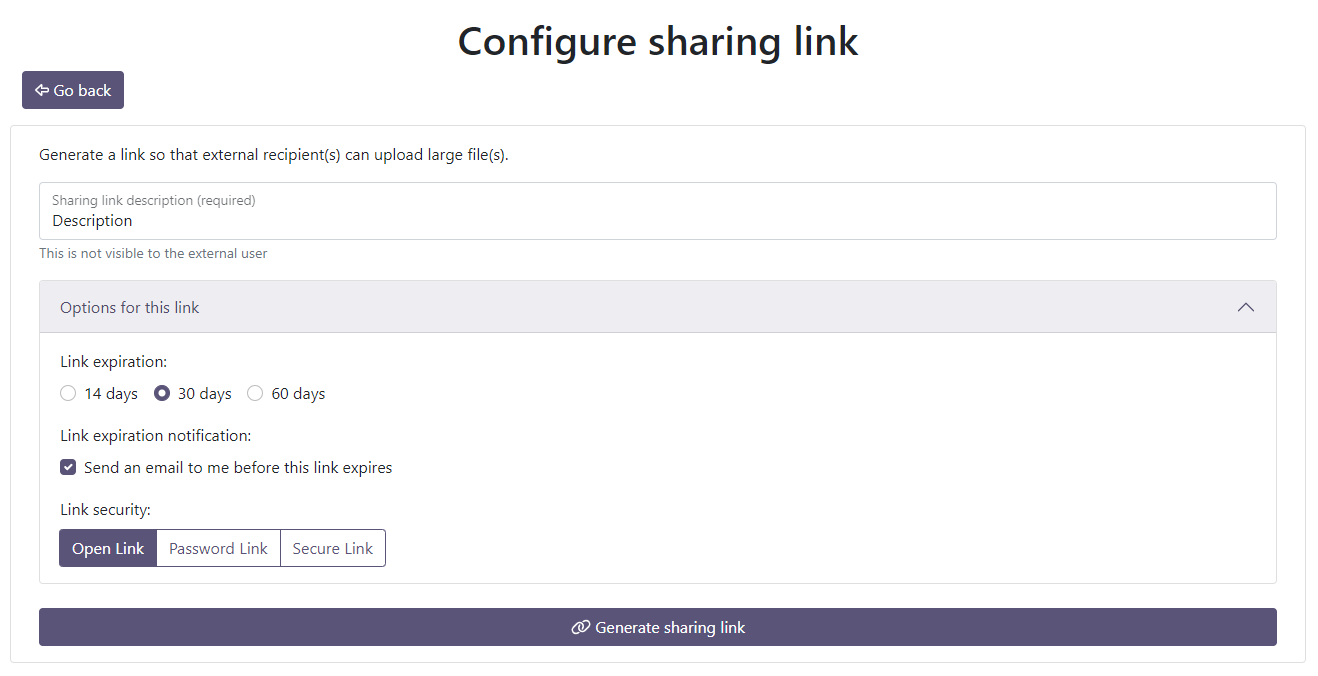
Enter a description for the sharing link and optionally tweak the options for the link:
Link expiration determines how long the link will be active for (default is 30 days).
Link expiration notification allows you to toggle the notification email that is sent 2 days before a link expires (default is on).
Link security allows you to change the default security (Open Link) to a more secure standard (either Password Link for an automatically generated password, or a Secure Link which is restricted to your email and the external recipient(s) email address).
Once you have set the options, press Generate sharing link.
You will then be able to copy the link to your clipboard and paste it into an email ready to be sent to the external recipient. You can also send an email directly from the portal using the Send link button:

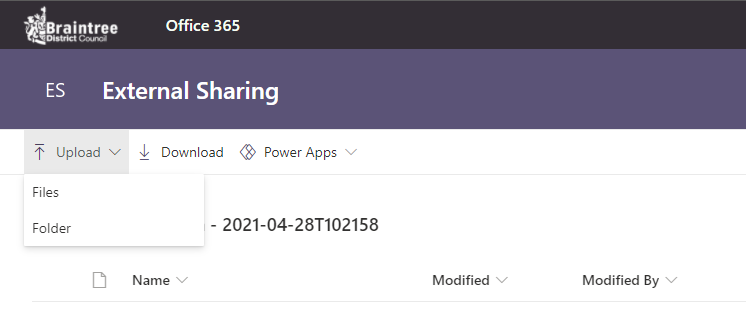
The external recipient will then be able to upload files using the link and you can then access them using the same link:
Go to the External Sharing Portal and click on the View created link(s) button:

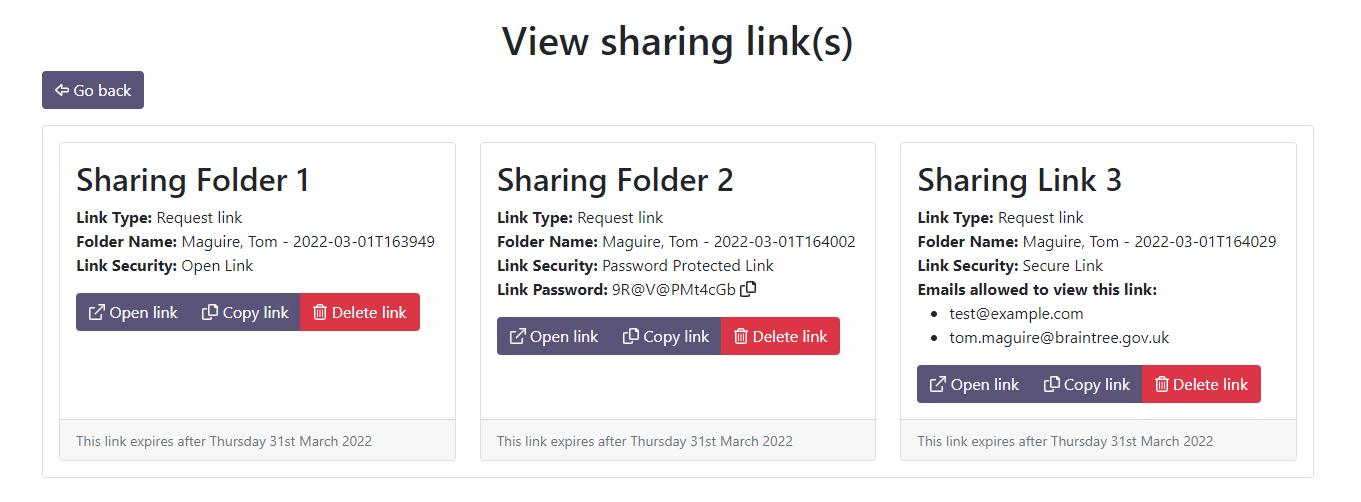
You will then be presented with a list of links you have generated including their description, type, expiry date and options to copy the link to the clipboard, open it in a new tab or delete the link and files. If you have created a Password Protected Link or Secure Link, the password/restricted list of users will also be displayed:
